Before we dive into A/B split testing, remember my last Rocks Digital article? I discussed how to get more ROI from your social media marketing through the use of UTM codes and Google Analytics.
Wow! The response to that article was amazing! Thanks for reading! But now we’re going to dig a little deeper into one part of that article that I didn’t touch a whole lot on: split testing to get even better results.
I’ve talked before about A/B split testing ads, and that’s something we should be learning how to do now – and then do it – after our campaign ends (or during, if you’re a pro like that), to gather intel on who bought from us, what they liked and didn’t, and who we should probably be marketing to more often to increase our sales even further.
Let’s Do the Splits – A/B Split Testing
Remember, from my UTM tracking article, when I mentioned in our goals process that we chose Product Page X? In this article, we’re going to talk about how to split test that product page with a totally different page, to find out what our audience not only likes more, but will buy from more often. This is called “split testing” or “AB testing,” or sometimes also “A/B split testing” – but it’s all the same thing.
Now, in that last article, I didn’t discuss testing the product pages or the ads against each other during the campaign, but you should absolutely do that. From my experience, any good campaign lasts a few months, and the amount of data that you can collect from that timeframe is golden stuff. While you are tracking your campaigns you should also be willing to make some changes as well, and create lots of test ads and a few product pages.
To that end, I’m going to tell you to get ready to create 3 different product pages for the same product. Why would you want to have the same product on 3 pages? Simple. People like different things, and you may not really be in tune with what your audience wants to see or read or experience, and that is why we are going to split test 3 landing pages!
First of all, creating a good landing page isn’t exactly super-easy, however, it’s not rocket science either. One of the first things you should do before creating anything for your product ads is to create the 3 product pages (on the flip-side, you could create just 2). So for now, check out some of your competitors’ landing pages – and landing pages that have converted YOU – and find what was most appealing. If it worked on you, it may work on your customers, too.
Designing Moments
Once you’ve narrowed down what you want to try out from different websites and landing pages, talk to your graphic designer and have him/her create a few mock-up designs based on your branding, your product or service – and, of course, your target audience – using those elements you chose from the other pages you saw. Once you have 3 distinct winners, take the mock-ups to your web designer or admin and have them create the pages, unlisted, on your site. You don’t want them showing up in the menus because we need to test them, and unwanted traffic will just mess up our data.
To give a very quick example, here are 2 versions of a web page on my website: one is the original, and the second is the improved version of that same social media marketing services page.
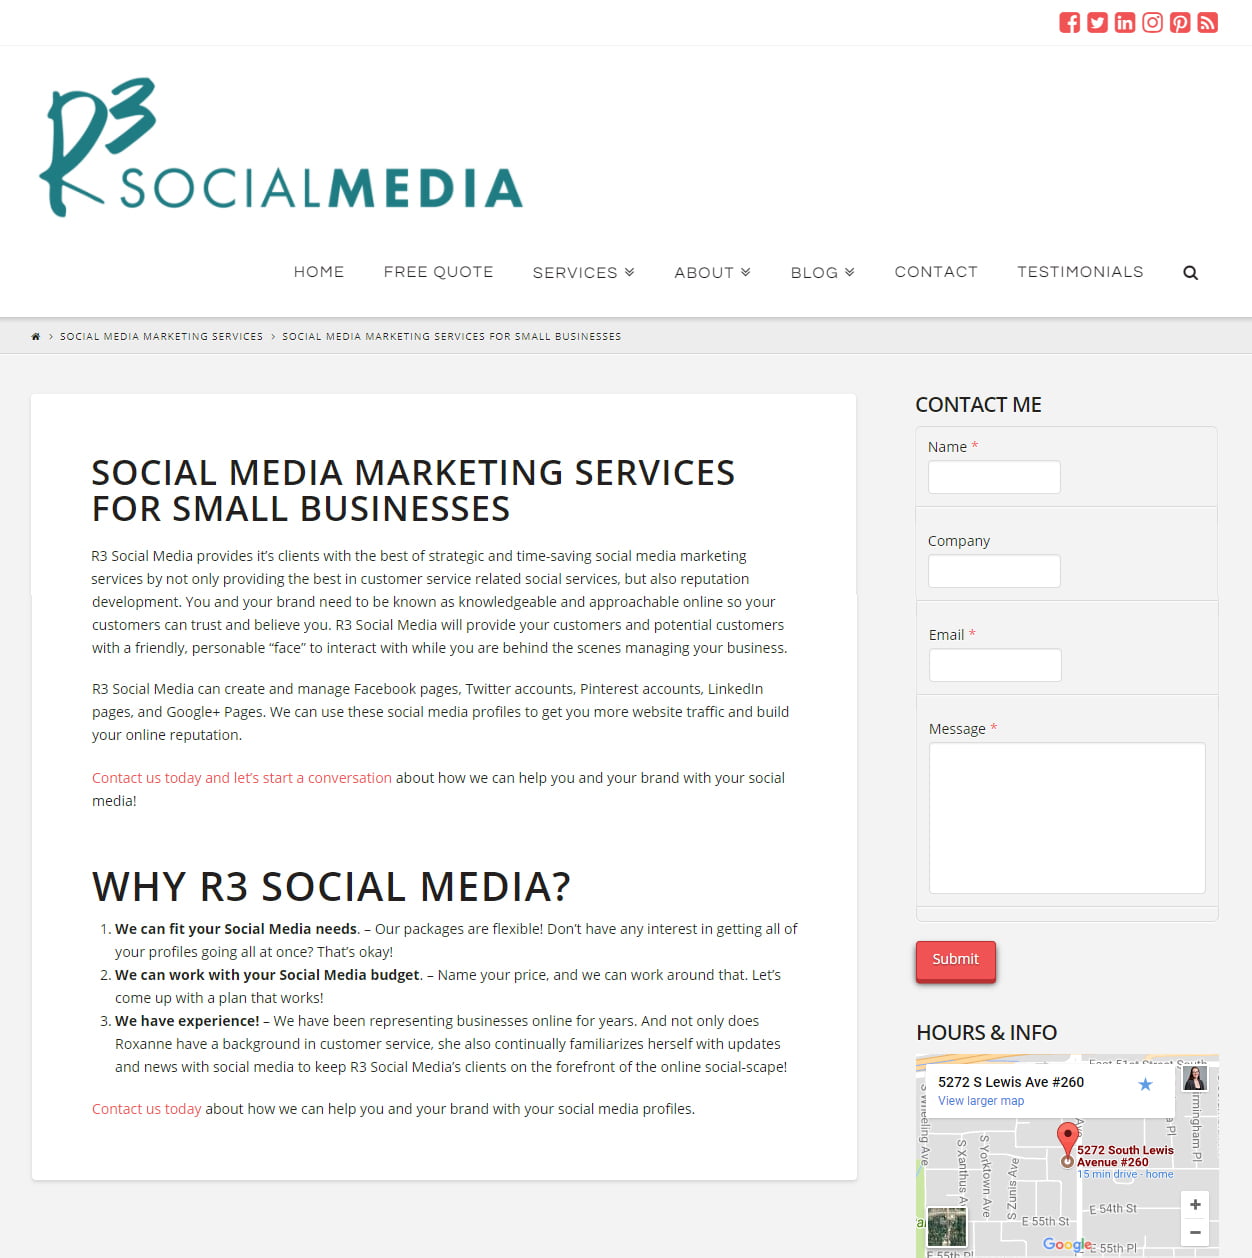
Before Optimization
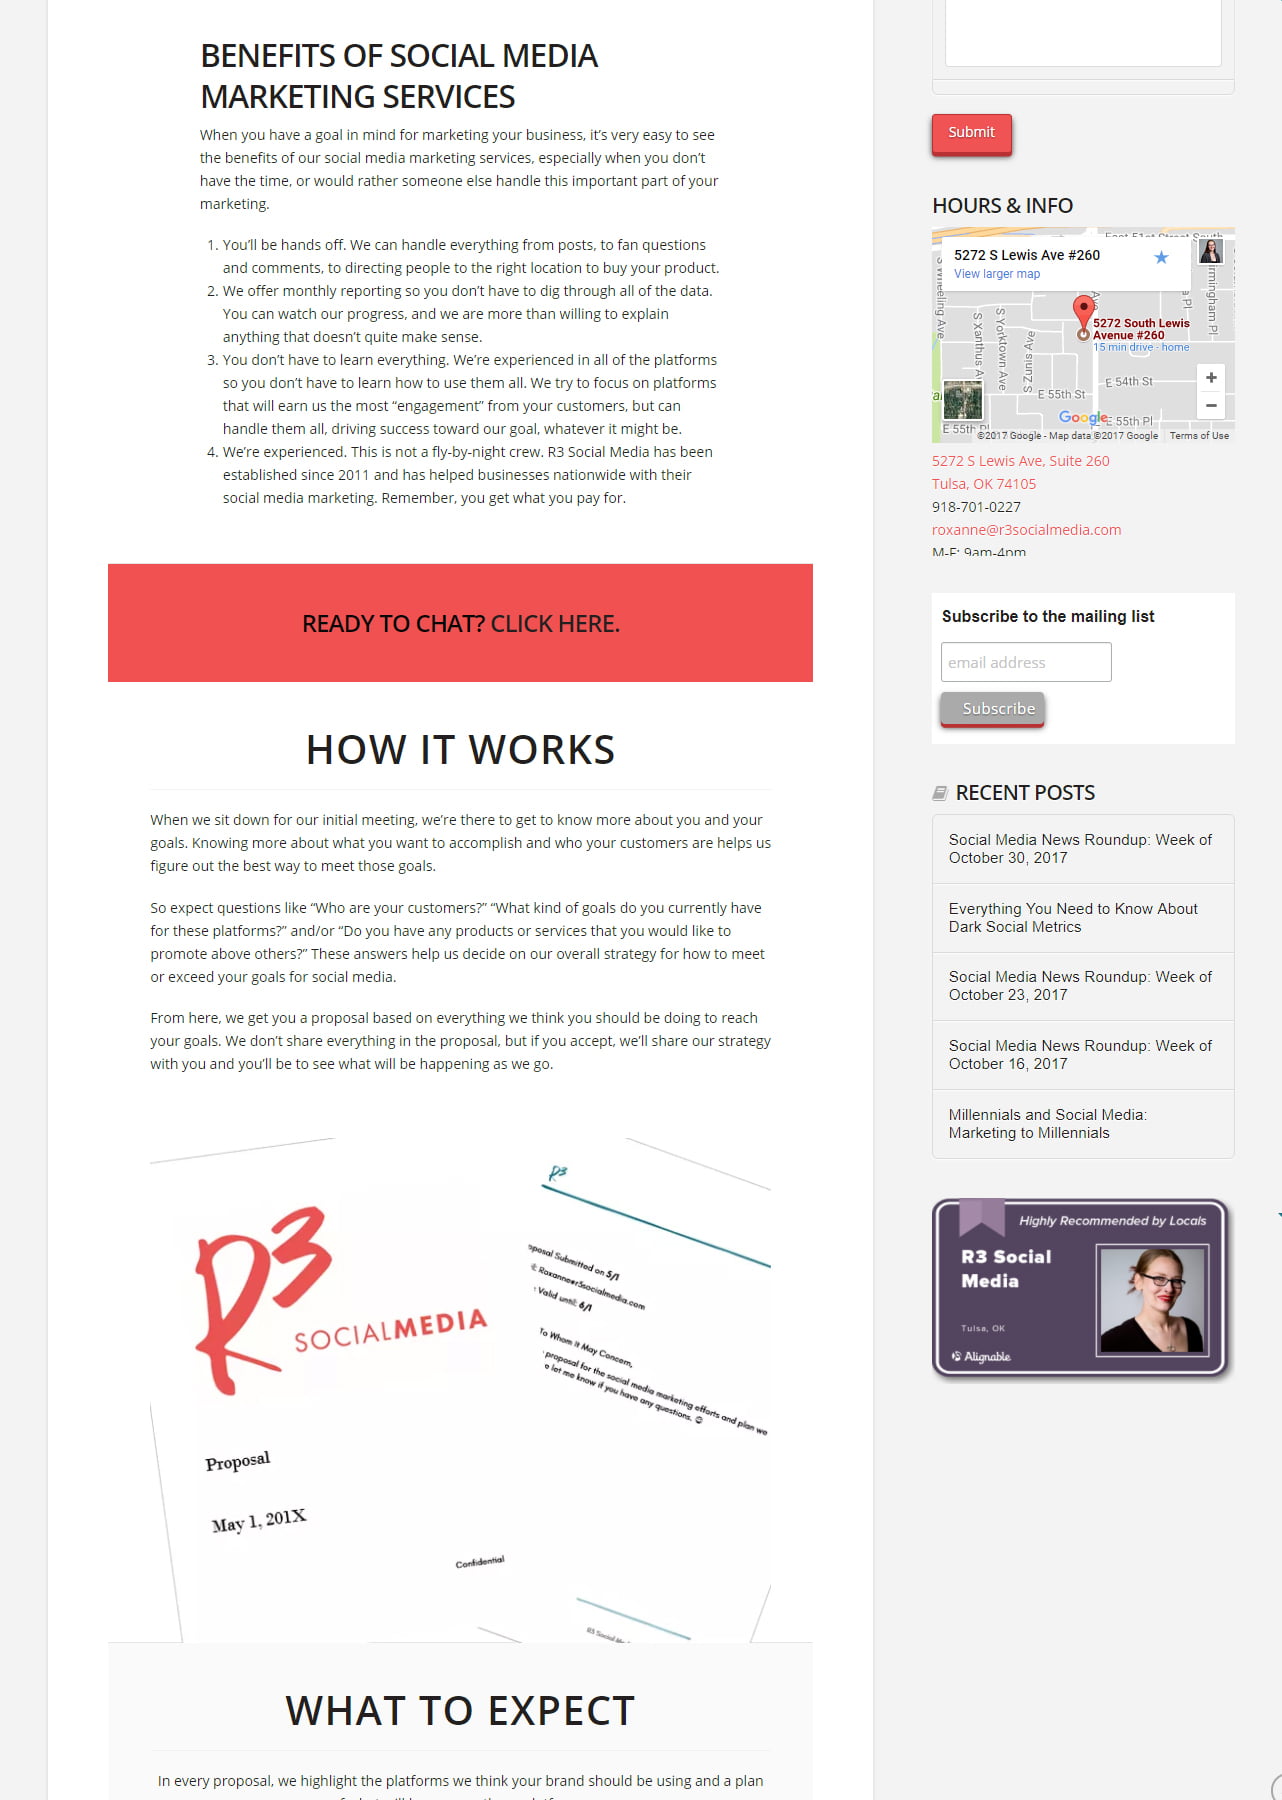
After Optimization
Now, just based on these images, which do you think converts better? I bet you guessed it: The newer one does a lot better.
This is what we want to know when we are creating your landing pages and then, your ads. We create the 3 different pages using knowledge about our target, and research on what helps people convert on a landing page – then we use our ads to figure out what kind of ads work on our target. (Or create 2 different landing pages, making the test smaller.)
All the Testing and Reporting
The best way to test a LANDING page is to, of course, direct traffic to this page or pages. Knowing your target, you should be able to place these links in places you know they’ll probably (most likely) click on them, such as Facebook or on LinkedIn. Since those two platforms have different audiences, it might be good to use two different landing pages, and then switch the links at a specified date to determine which platform liked which page better.
You determine this, of course, by conversions – but also by going back to our handy, dandy Google Analytics report!
By looking at our Acquisition > All Traffic > Social > Landing Pages report, you can see which networks brought you the best kind of traffic. The active, engaged kind. Not the bouncy, short-lived kind.
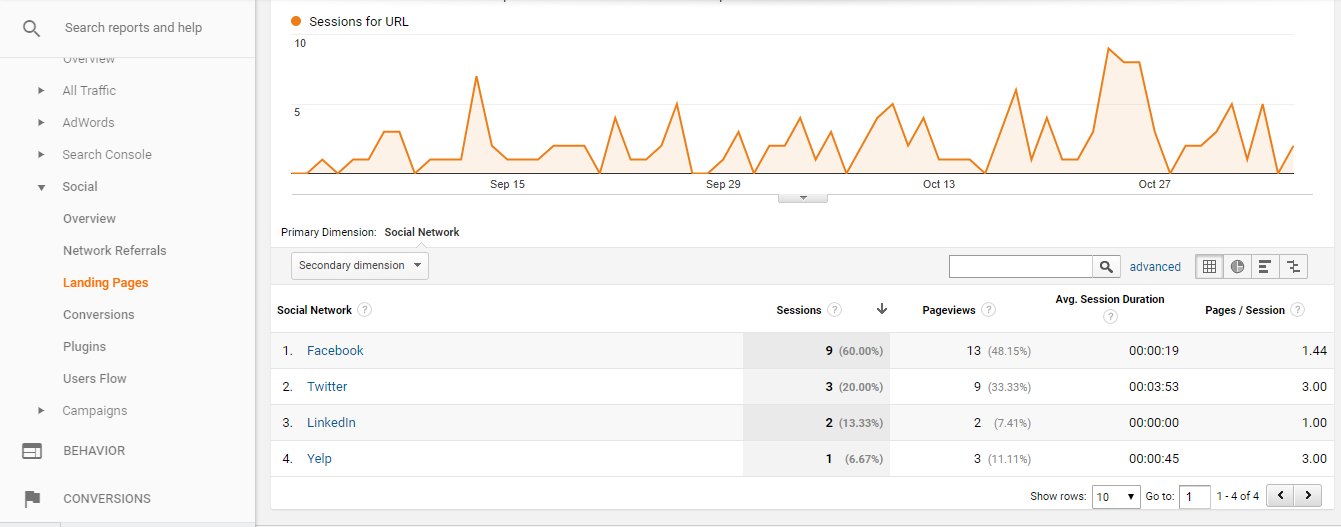
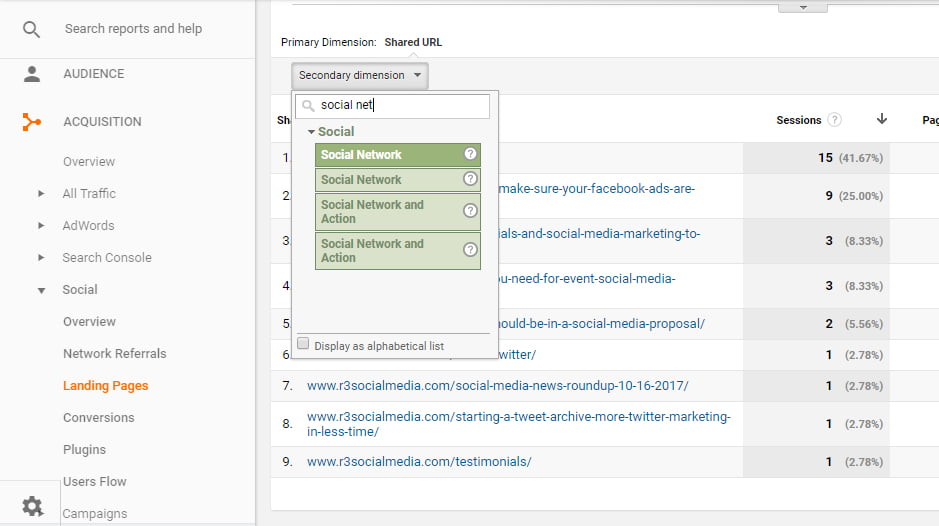
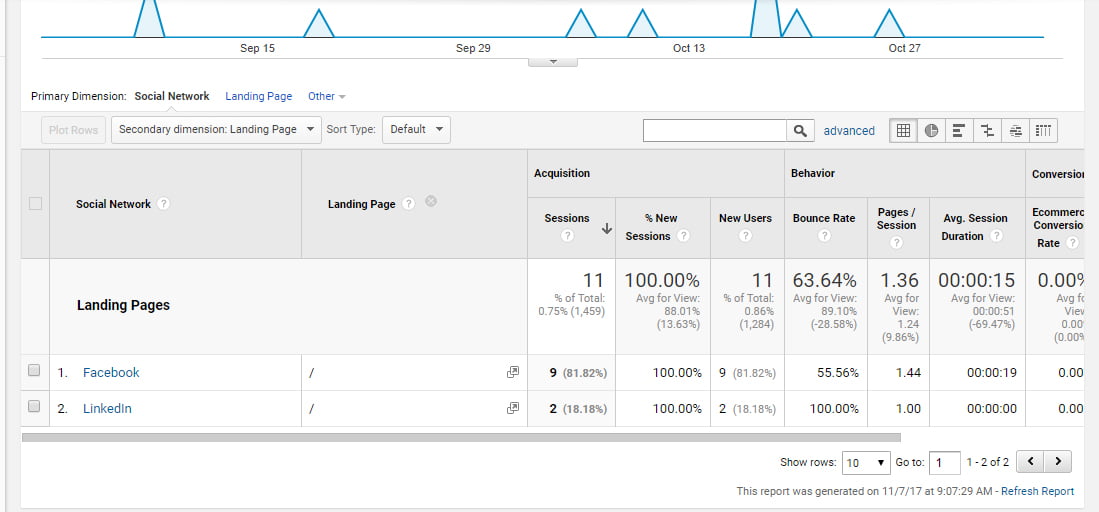
These are the landing pages that people have clicked through to on your website from Social networks. If you add a secondary dimension, by clicking on the “Secondary Dimension” button, type “Social network” into the text box and select the first option, you’ll see it adds a column listing which social media networking was responsible for what pieces of traffic to each landing page.
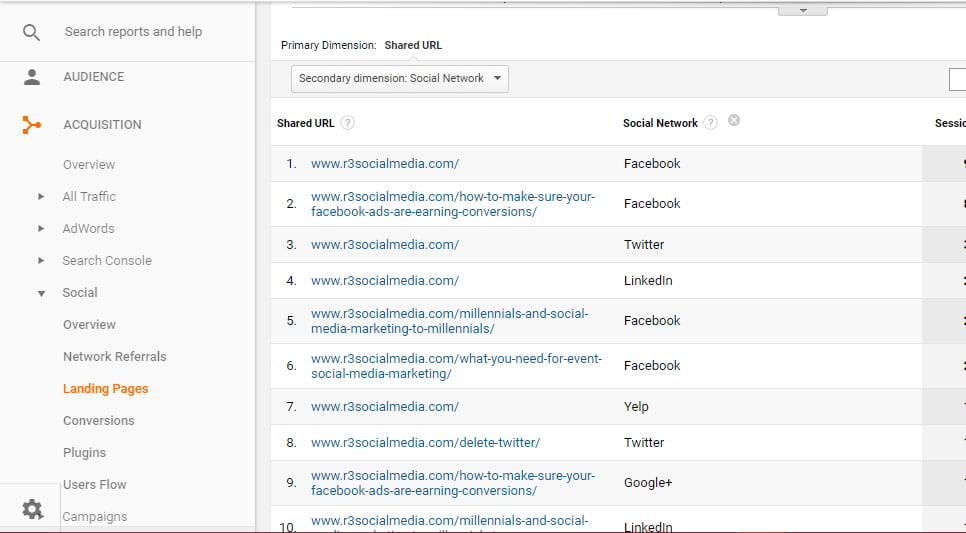
Now we just need to see how they interacted with our landing pages. Click on the URL of one of your landing pages for this campaign and it will show you another report on which social media platforms sent traffic to that page, and how well that traffic acted on your site.
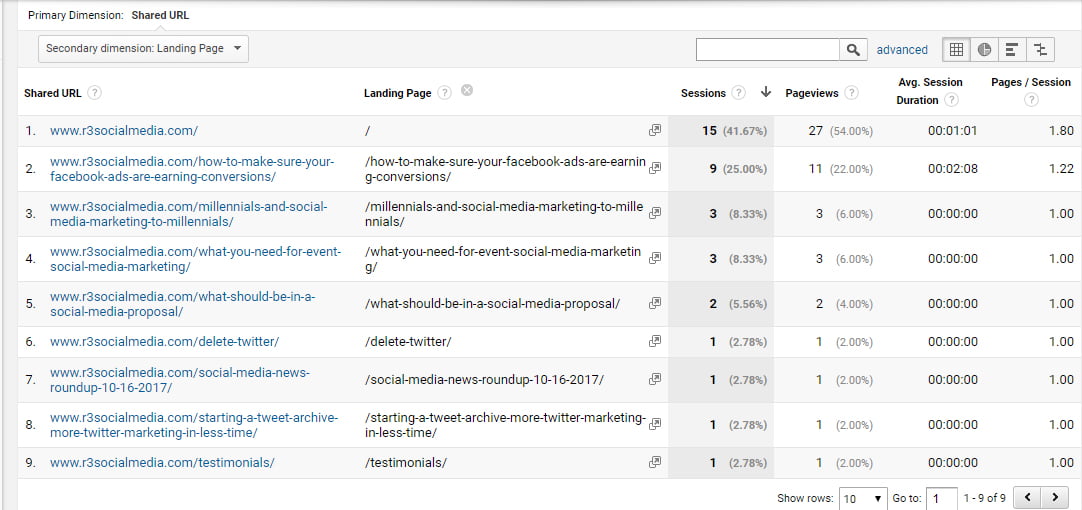
While we can’t see the fun information on this report, like bounce rate, we CAN see average session duration and pages per session. These are still pretty valuable numbers, because if you have a high session average, then people are probably not bouncing away. If you have a higher pages per session, people are also probably not bouncing away. You can also double-check this by checking the All Traffic > Channels > Social report. And voila! You can see bounce rate, new users, and even conversion data.
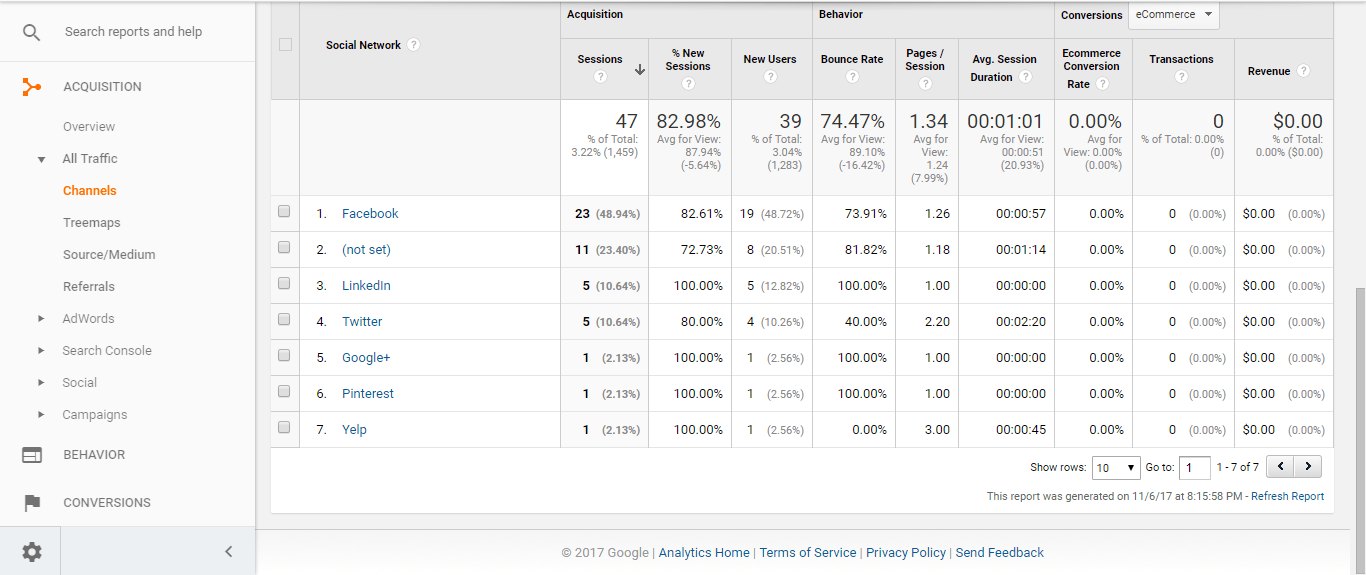
Segmenting Your Data in A/B Split Testing
Now this won’t be directly for the traffic for your landing pages, so let’s create a segment, to make this easier.
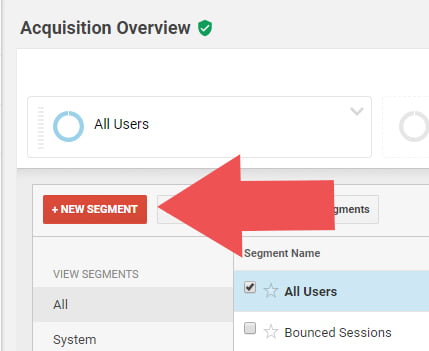
At the top of the page, click “+Add Segment” then click “New Segment.” Now click on “conditions” on the left-hand side of the menu. Here, you’ll start adding filters for your traffic to tell Google that you want to see traffic information for just the traffic that matches the parameters you are setting.

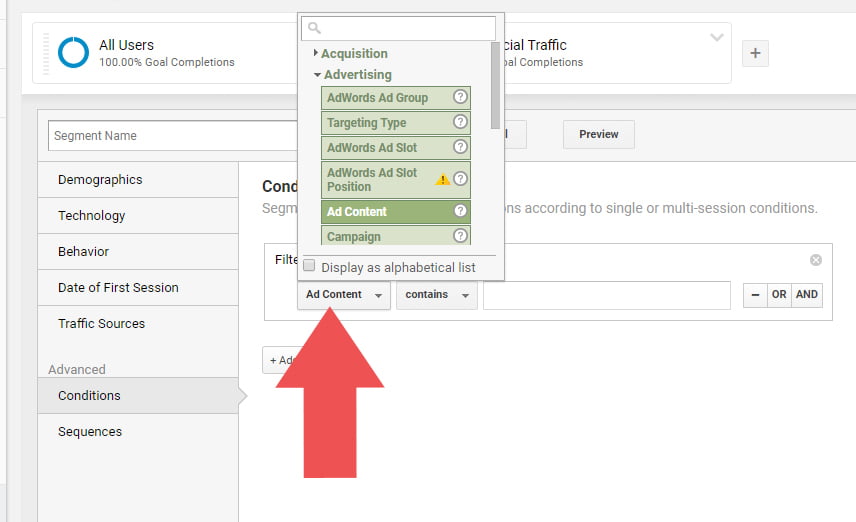
In the first box, change “ad content” to “source.” You can type “source” into the white box at the top of the menu that opens. We’ll leave “contains” as it is. Now begin typing in a name of a social media platform. “Facebook” is my first one.

Now click “OR,” and another filter box appears, and we’ll change the settings to this one to say “source” “contains” “twitter.” And click “OR” again. Fill in more filters until you have listed all of the social media platforms you are using to promote your landing pages.
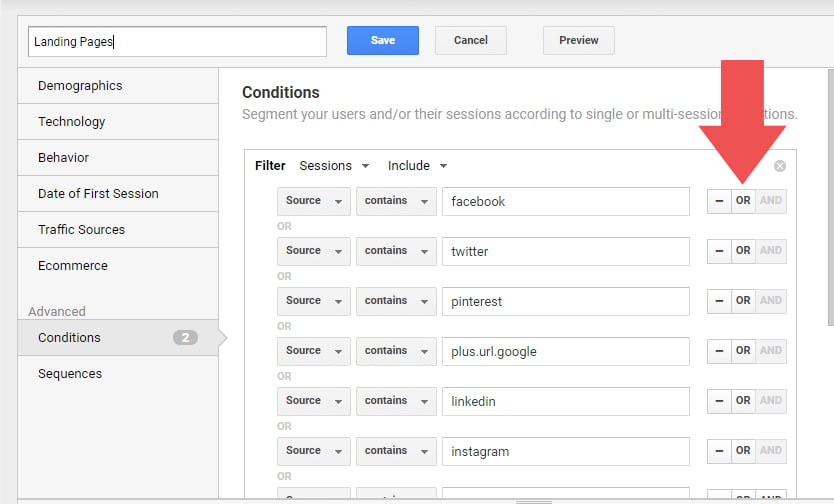
Once you have finished this, click “Add filter.” You’ll want the boxes to say something different this time, so the first box should say “Landing Page” and the second box should say “Exactly Matches.” In the text box, type in the URL to your first landing page. Click “OR” and add the second (or third) URL for the next landing page (mine are pretend landing page URLs).
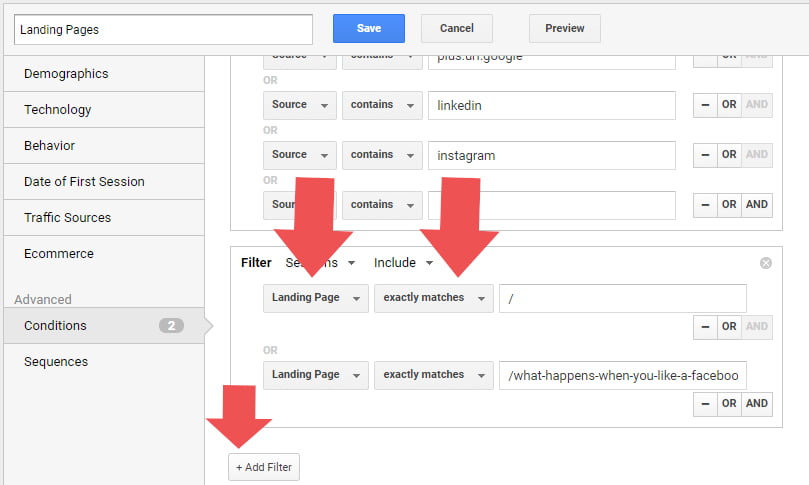
When you’re finished, be sure you’ve named the Segment at the top of the page, next to the blue save button, and then click “save.”
This will take you to a report comparing the traffic we just segmented to “All traffic.” Click on the arrow next to “All traffic” at the top of the page and click “remove” to remove that segment data and clean it up, so you can read the segment we just created.
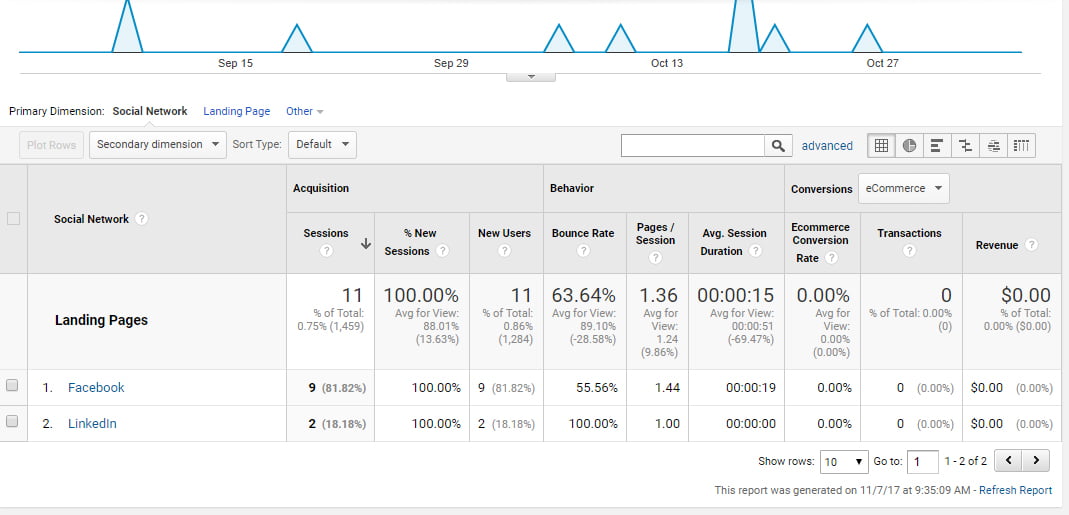
As you can see, this information gives us the data from the landing pages we included in the segment, and breaks it down for us by social media platform. Wonderful stuff.
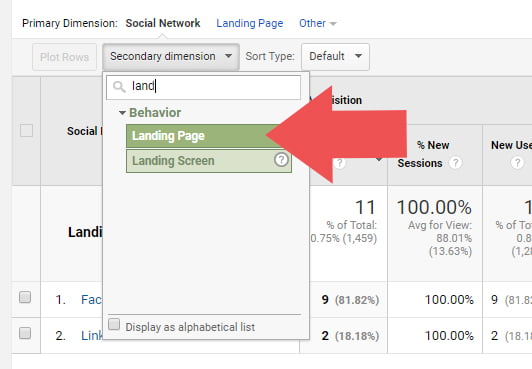
Now just add a secondary dimension for landing pages, and you can now see which landing page goes with what social network. And since the segment is saved, you can use this report anytime that you want/need!
Master Testing and Tracking via A/B Split Testing
Of course, some of this information is similar to when you run social media ads, but I definitely recommend using the UTM tracking method I mentioned in my UTM article for simple reporting.
Now that you have information flowing in about your landing pages, you’ll be able to figure out which pages convert better, and then you can start creating similar pages to further test the copy, the images, the layout, etc. This is what A/B split testing is all about. Testing. Every. Thing. All The Things.
Will you now refine your A/B split testing? Has this article clarified the process? Let’s hear your thoughts in the comments!
Roxanne Roark
Roxanne R. Roark is a seasoned social media marketer from Tulsa, Ok, with a passion for learning and conquering the digital space for her clients through strategic social media marketing!


