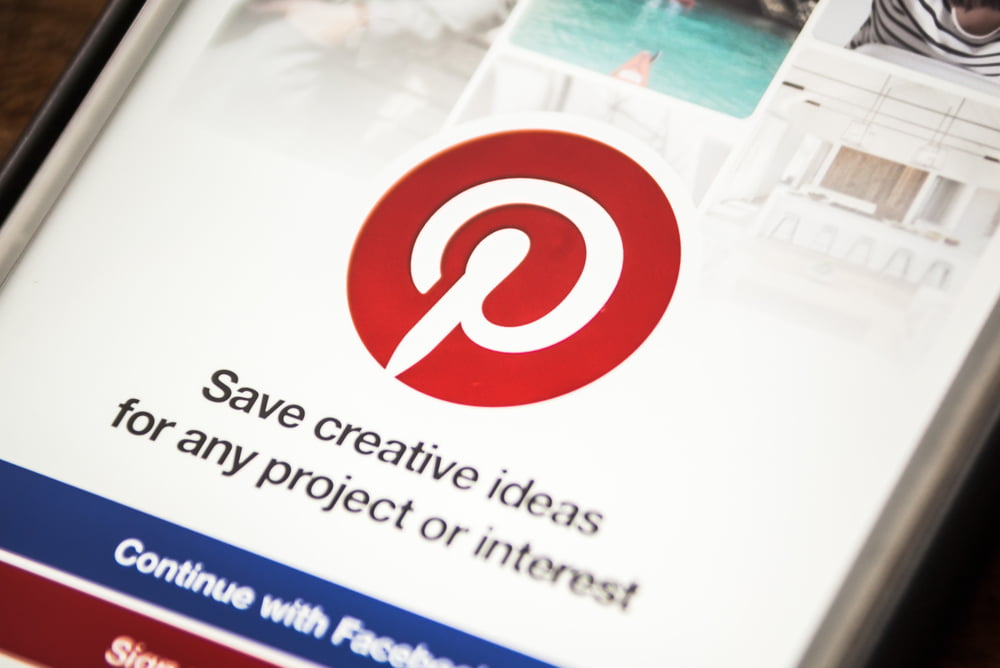
If you’re a blogger or a business owner, you’ve been told to use social media by everyone on the internet. If you’re into sales, you’ve been told to use Facebook ads, Instagram, and Pinterest marketing. Let’s look at how to use Pinterest for your blog or your products or services, as a business owner. How do we get more sales? How do we earn more traffic? More leads? My goal is to help you figure out those things using Pinterest – with some actionable steps included!
Why Use Pinterest Marketing
Pinterest’s users are actually looking to connect with brands and find products they want or would like to have. Users are there to basically plan for purchases. Pinterest tells us “Pinners are eager to connect with brands. When asked who they would rather follow—their favorite brand/store or celebrity—83% of people said they would prefer to follow the former.”
And even better, according to research done by Shopify, the overall average order value from Pinterest referral traffic is $58.95. That beats Facebook at $55.
So why Pinterest? This platform can easily earn you more dollars from users that are already prepared to buy from you – and best yet – looking for your products or information.
Getting Set Up for Pinterest Marketing
Ready to get started? Be sure that you have a business account. If you don’t, you won’t be able to use analytics, promoted pins and videos, etc. But of course, there is a difference between your personal and business accounts that you should be aware of; the Terms of Service. Read through the Business Terms of Service that was updated fairly recently on November 1st, 2016. You’ll want to know what your responsibilities as a brand will be and what rules the platform has.
You can create a Pinterest Business Account using this link, or if you need more detailed instructions, you can find a pretty great version from HootSuite here. I won’t cover that in this article, as I want to focus on using the platform for your marketing.
Be sure to also get set up for Rich Pins. This takes some coding on your website, but it’s totally worth it, as Rich Pins and regular pins look different. Rich Pins, such as recipe pins with the recipes listed on them, show a lot more information and are a lot more engaging for your customers. You can find more information about them and setting them up, here.
And don’t forget to set up your Pinterest profile. Be sure that your avatar is a company logo, or your handsome face, and that the bio is well-written. It’s best to keep all biographies across social media the same or very similar, to let your customers know it’s really you. And again, you can find additional information here.
Marketing on Pinterest
Great. So you’re set. You’ve got your website confirmed, you’ve got analytics, you’ve got Rich Pins. You’re ready to really start pinning and setting off with your first official Pinterest campaign. Awesome. Let’s talk about what you should be doing, why, and how it helps.
Setting Up Boards
One of the first things you’re going to want to do is set up the boards that you will be using in order to place your pins. These can be WHATEVER YOU WANT, so think back to your customer (even better if you have a persona) and about what they would want to read, see, and do. For example, one of my personas is a woman in her 30s that likes to take care of her health by eating healthy and getting involved in outdoor activities like hiking, camping, and mountain biking. So I have made a few boards dedicated to things like “Healthy and Yummy!” where I pin healthy snacks and recipes, and “Camping Hacks,” where I post helpful tips for camping. You’ll notice that I’ve included the keywords “health” and “camping” in my board titles. These words help when users are looking for new pins to check out or boards to follow, especially when getting started and they are asked for a few categories to follow.
Once you have the title in mind, be sure to also create a description. It’s possible to “Create a Board” while pinning something, but it won’t let you change the description at that point, and most likely, you aren’t going to go back manually to do it. So be sure to only create boards manually so that you are sort of forced into adding the description at that time. Be sure to also add some keywords here, to help give your board another boost for searches. My Healthy and Yummy! board’s description is this:
“Everyone wants to know a good recipe that is not only healthy but also super yummy! Find recipes that are low calorie, full of protein, or fruits, veggies, and other really healthy foods, plus information to help you find easy to eat healthy snacks!”
Don’t get bogged down with your keywords, though. Write something that will make sense to people and the overall idea of your board. Pinterest is just like other search engines, after all.
You’ll probably want at least 5 boards to start with, but 10 is good, too, if you’re going to be ambitious.
Theme Your Boards
Another way to get attention and lend energy to your account is by creating a theme for your boards. You can create themed boards, such as a board all about a holiday, and then create an entire color theme out of your boards. For example, my friend Carol at Your Social Media Works has her page themed with the color blue across all of her boards right now.
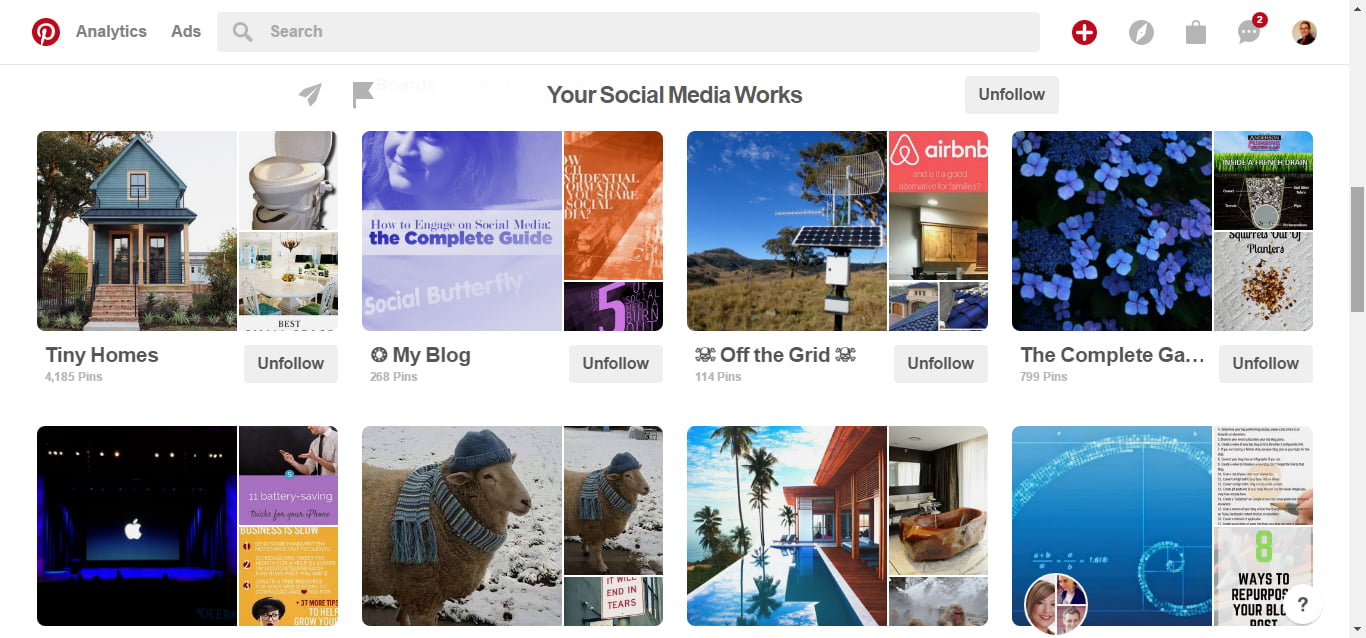
As you can see, it creates a visually cohesive look and it’s pleasing to the eye. It also can help with branding as you might have seen a lot on Instagram.
Similarly, you can move your boards around on your profile page, to re-order them. (“GASP!” I know!) So when a holiday is coming up, or you want to have a little more attention on a particular board, drag and drop them into an order that helps those first few boards stand out on your page.
Pin Your Heart Out
OK, OK. Not literally. Like… don’t go nuts. But now is the time to fill your boards. One of the first things I do on Pinterest is go through the popular and trending pins to see if anything fits my boards. This can be done two ways, because Pinterest likes to narrow down things for you, and show pins that match your boards and other pins, while also showing you what Pinterest thinks is popular today.
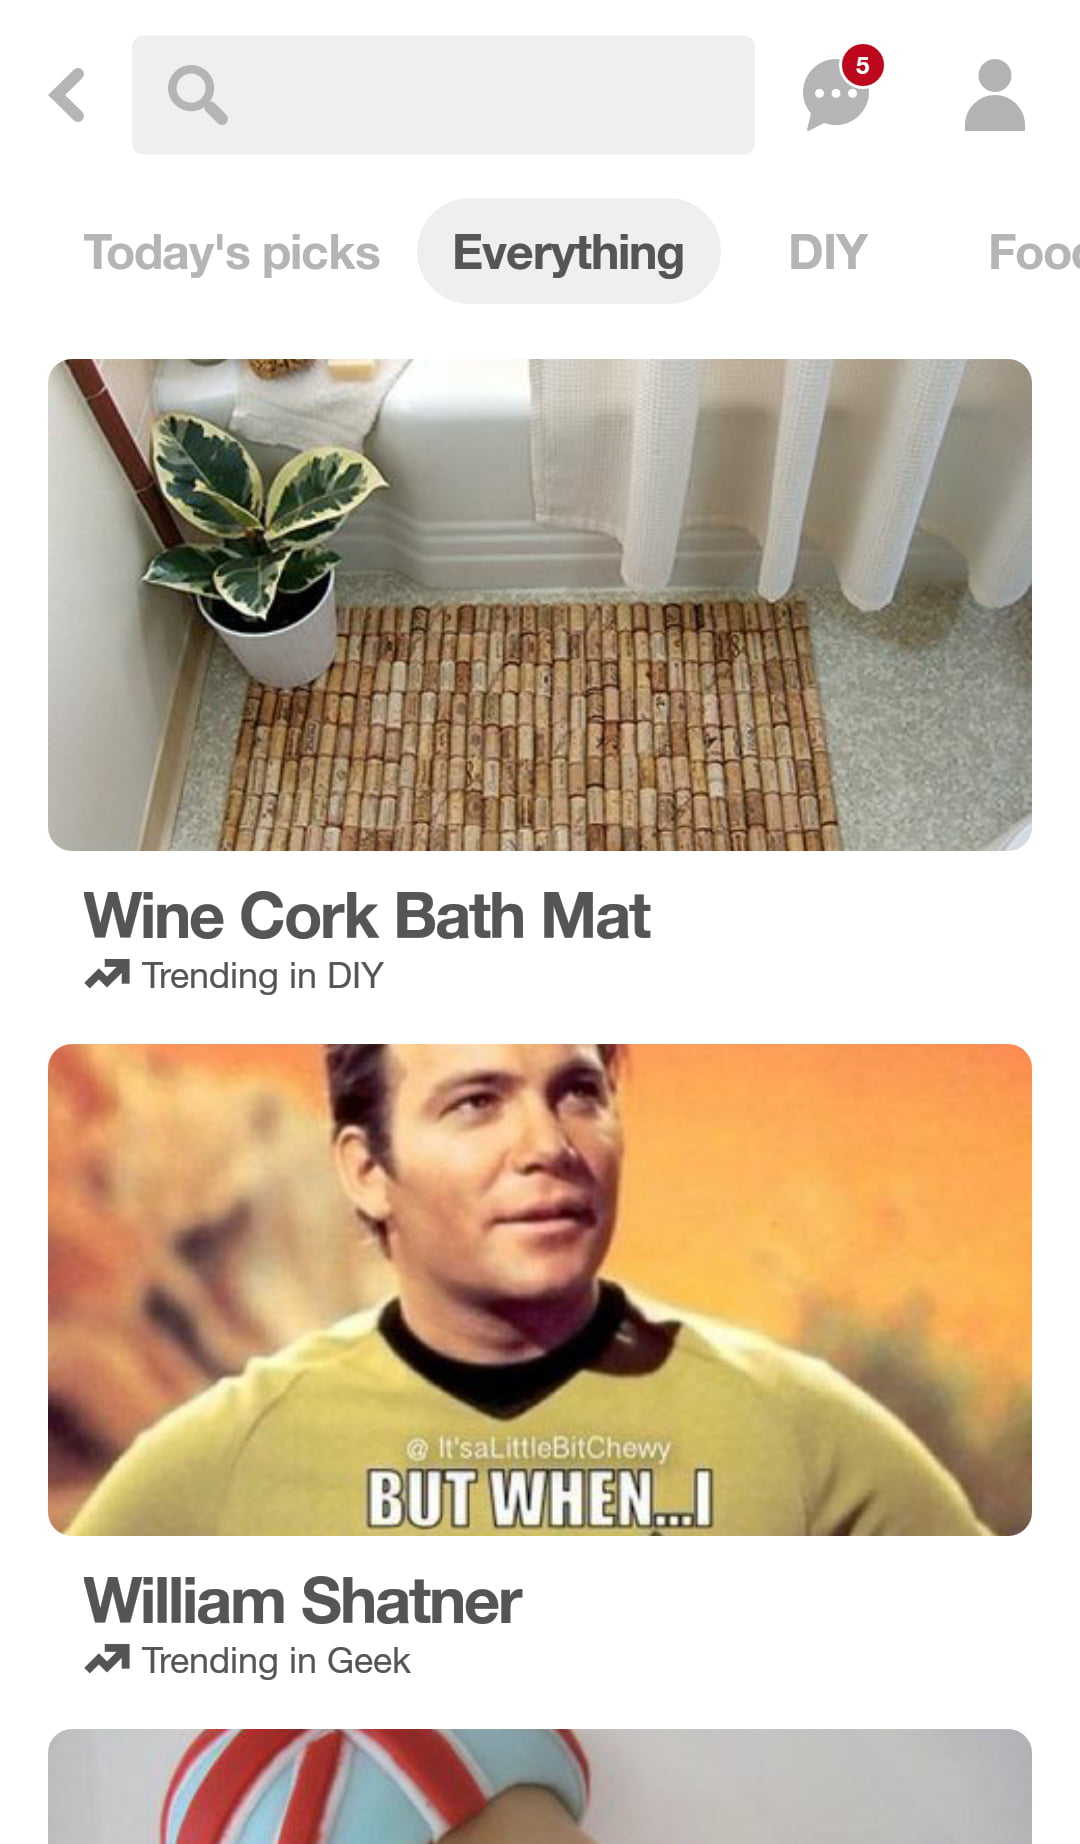
The first way is using the “Explore” function. This can be done on mobile (I’m #TeamAndroid) by simply clicking on the search bar. There, you are taken to a screen showing you “Today’s Picks” and some other tabs like “Everything,” “DIY,” “Food,” etc.
On Desktop, you simply click the little Compass icon, to the right of the search bar.
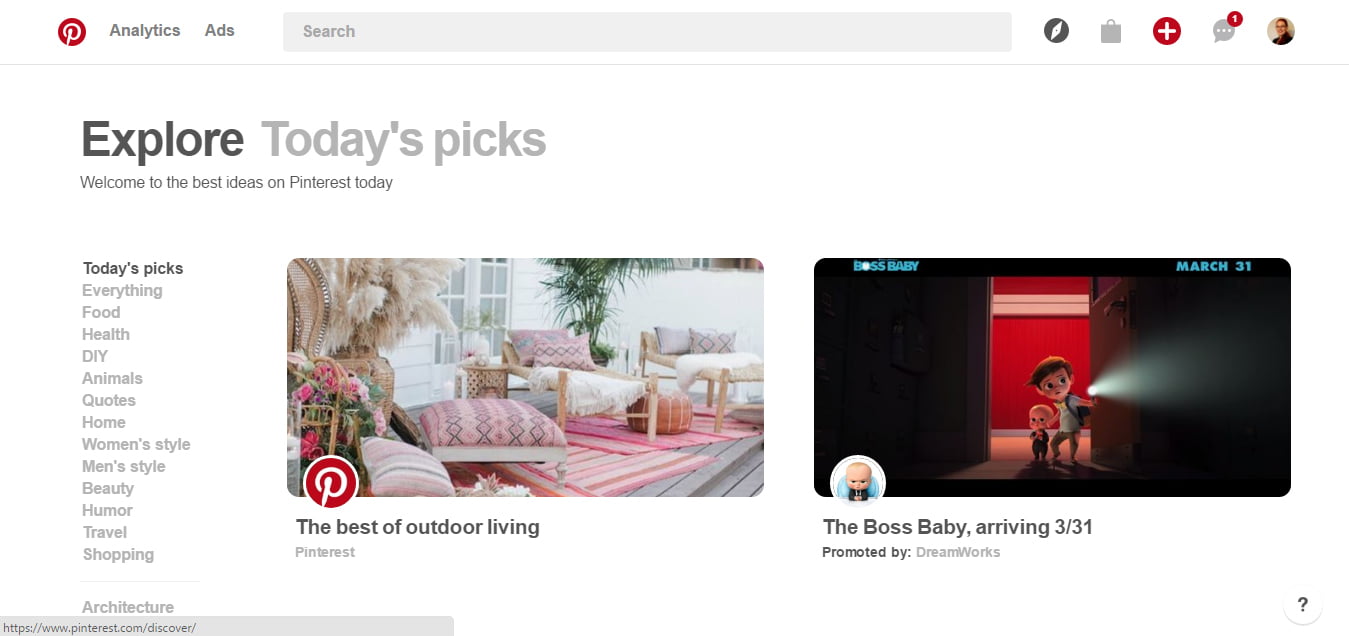
You can scroll through these, or choose a tab you want to look at to find the pins that match your boards.
The second way to do this is to check out the “trending ideas” on Pinterest.
You can do this by going to the search bar on mobile (I’m still #TeamAndroid) and tapping on the search bar to enter a search:
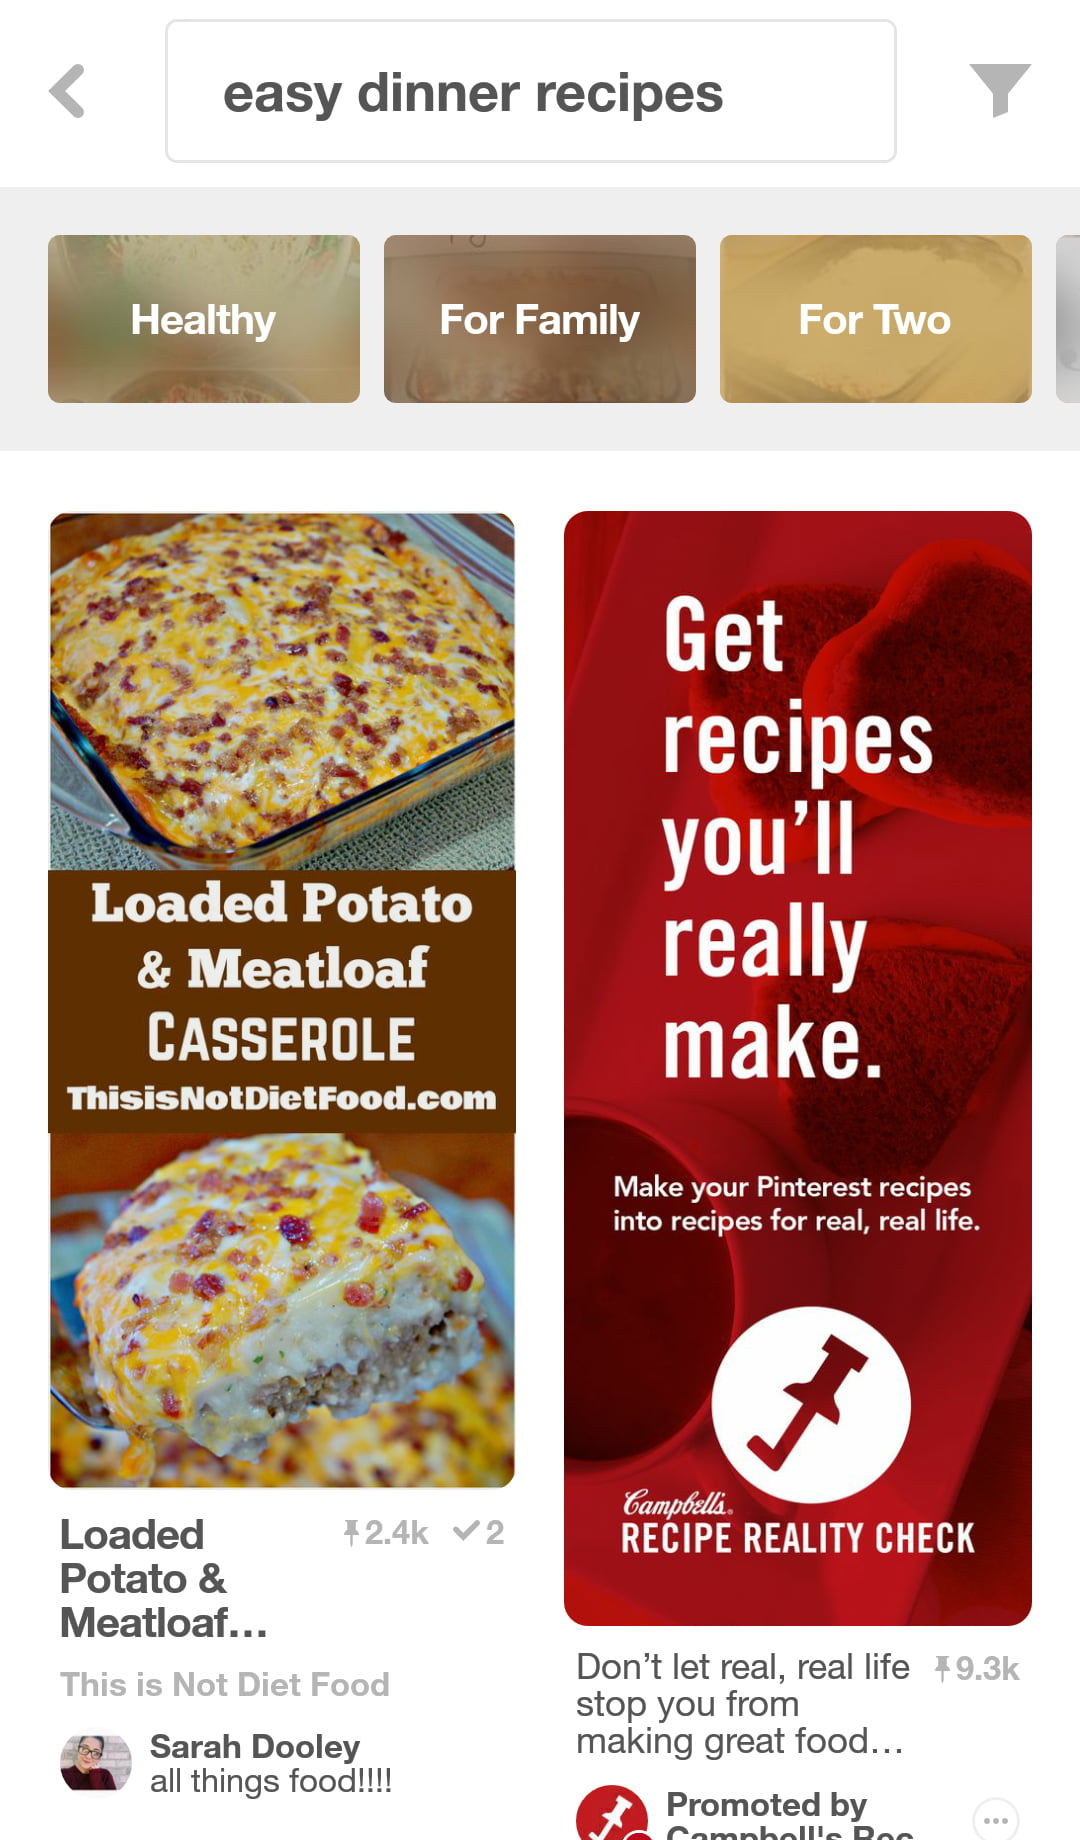
Or, on your laptop (does anyone use desktops anymore?), click in the search bar like you’re going to enter a search:
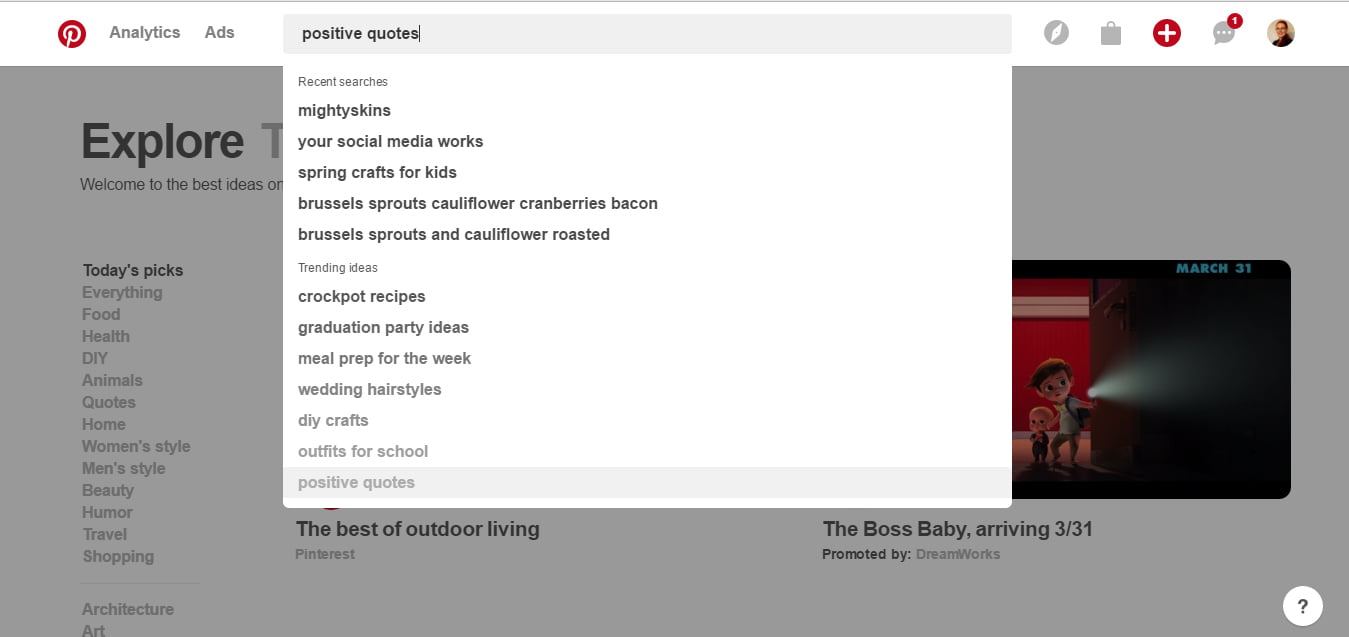
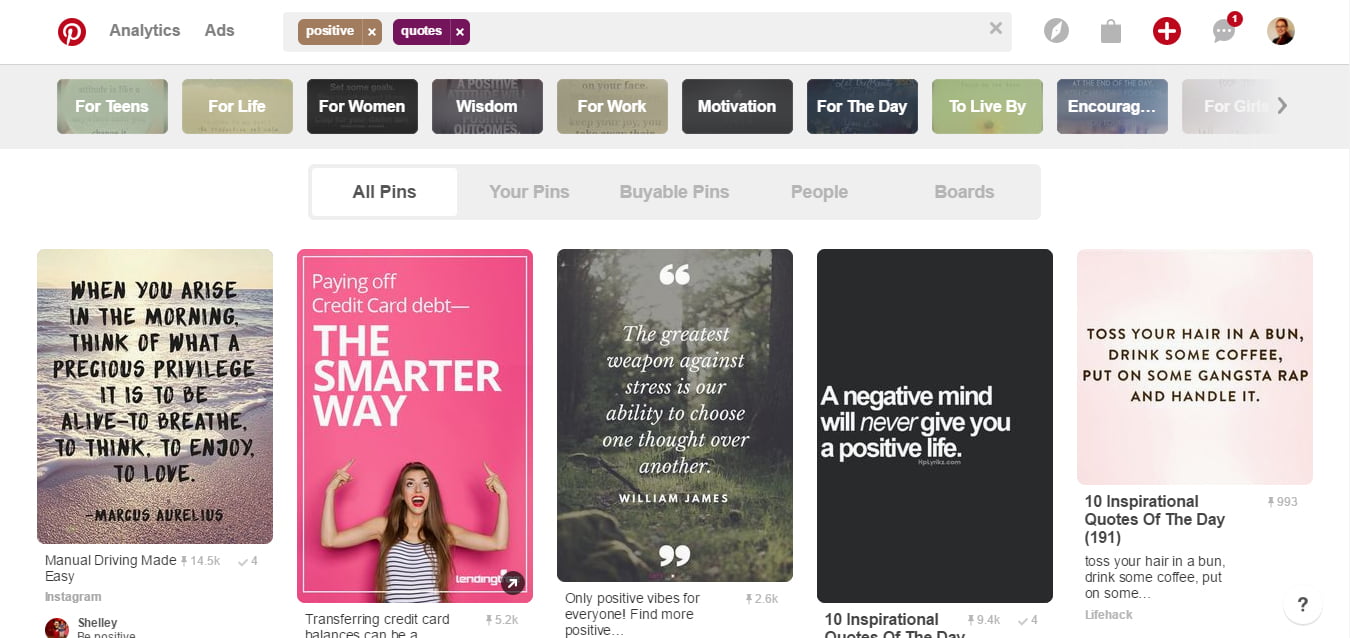
In these areas, you’ll find the “Trending Ideas” with some searches listed for you. If you click them, you’ll be taken to a screen with the pins that match that search. Easy peasy.
Be sure to also pin your own content once in a while to the correct boards. You can also collaborate on a board with a group that may also provide information that your customers would enjoy but perhaps aren’t direct competitors. I do that with a few boards for entertainment and blogs. Just don’t overdo it. As with all social, try to use an 80/20 mix; 80% other content, 20% your content.
Optimize Your Pins for Pinterest Marketing
So, one of the next things you need to know is that you shouldn’t just re-pin with the same descriptions. If you can add a nifty fact or helpful tip or hashtag in the description for your customers/readers/followers, you should do so – On. Every. Pin.
Sometimes, people see the same pin multiple times. But if you add a different description you’re doing a few things: 1) Adding some more valuable information 2) Adding a new hashtag to help others possibly find the pin. 3) Not boring people with the same thing over and over.
Changing the description is ESPECIALLY true if the pin is just an image, that links to nothing. Or if the description is in a different language (but the site is in the correct language).
And ALWAYS ALWAYS ALWAYS!! Click through your pins! Check out the site and the article and be sure that the pin is really what it says it is. If the site is crappy or missing, you don’t want to frustrate your followers the way you just got frustrated, right? No. So, click through, check it out, and move along.
Add the Pinterest Button to Your Site
Don’t be the only one adding your content to the platform! Add the Save Button to your site to make it easier for your visitors to share your content on Pinterest (and you should be creating awesome, valuable content for your customers).
Promoted Pins
Promoted Pins can improve the reach of your pins by putting them in front of people who are ready to buy from you. Getting started with Pinterest’s Promoted Pins is pretty similar to any other PPC platform (think Facebook), so if you have experience in social ads, you won’t have too much trouble getting started.
Just remember, it’s OK if your first campaign is not a super success. Keep making changes and tracking results in order to improve. It’s all about the data! You can find some information on ad testing and getting started with ads when you don’t know what you’re doing in my article about Facebook ads, here. Not convinced? Here’s a Promoted Pin Case Study with currently 35.9K pins across the platform for you to check out, too.
Analytics for Pinterest Marketing
Side Note: Pinterest introduced a change in 2016 that now shows us the number of re-pins a pin has across the entire platform, instead of individually (like it used to). While I’m not particularly fond of this change, there is a tool called TailWind that can still help you track that data and, of course, there are always UTM codes and URLs through Google, so you can track traffic through to your website.
Although this doesn’t help much with finding out if a pin’s popularity had anything to do with something we personally did (without buying a tool), this can still help us find out how popular a pin is overall. Now back to your regularly scheduled analytics info.
We should always be checking out our analytics to see how our efforts are working out. Is traffic being driven to our sites? Are we gaining followers? Are we seeing engagement on our pins? Depending on our goals, we’ll want to be sure to find out what Pinterest’s analytics say, and then back that up with Google’s Analytics so we know the data is correct.
“Trust. But Verify.” –Ronald Reagan
Pinterest analytics breaks the data down in 4 ways: Profile, People You Reach, Website, and of course an overview, which shows you a snapshot of all three.
Profile
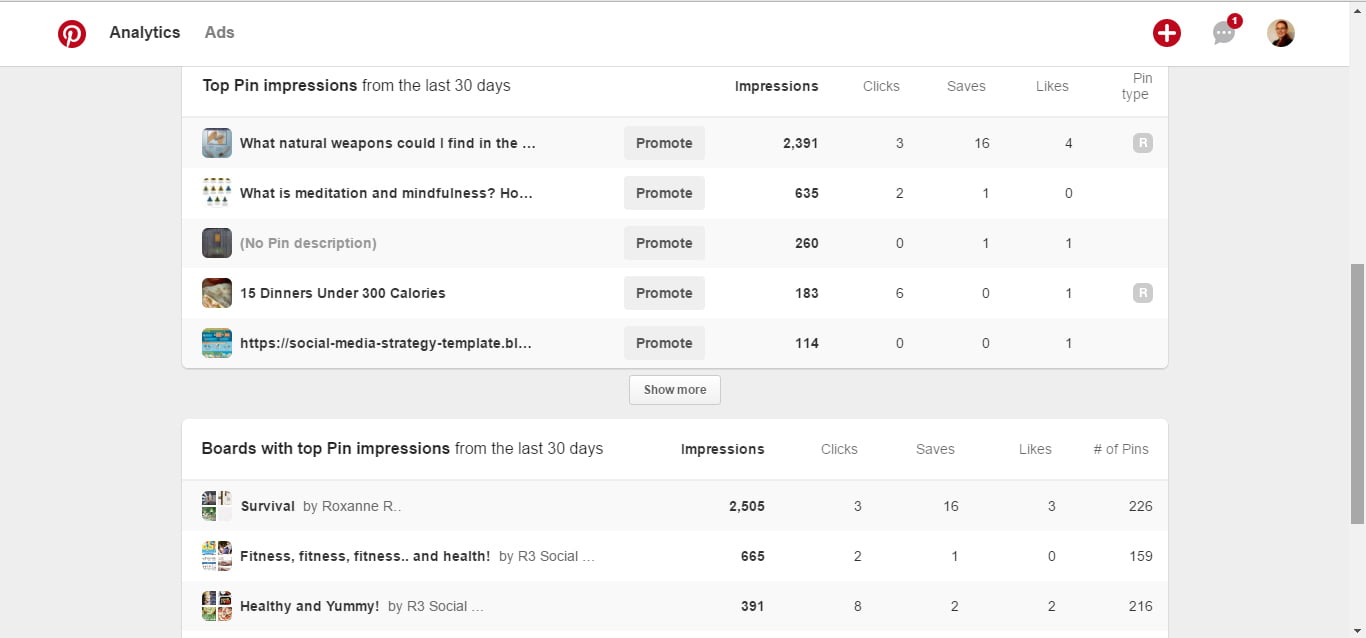
In your profile screen, you’ll see tabs for the data associated with impressions, clicks, “saves” (pins and repins), and “All Time.” When scrolling down, you’ll get information about your top boards and pins for each tab. Impressions – which typically means views – clicks, and pins, respectively. “All time” gives you data about your all-time top performing pins by “most shared,” “best performing in search,” and what they call “power pins” – pins that get a lot of views, clicks, and “saves” (I’ll never get used to calling them that).
People You Reach
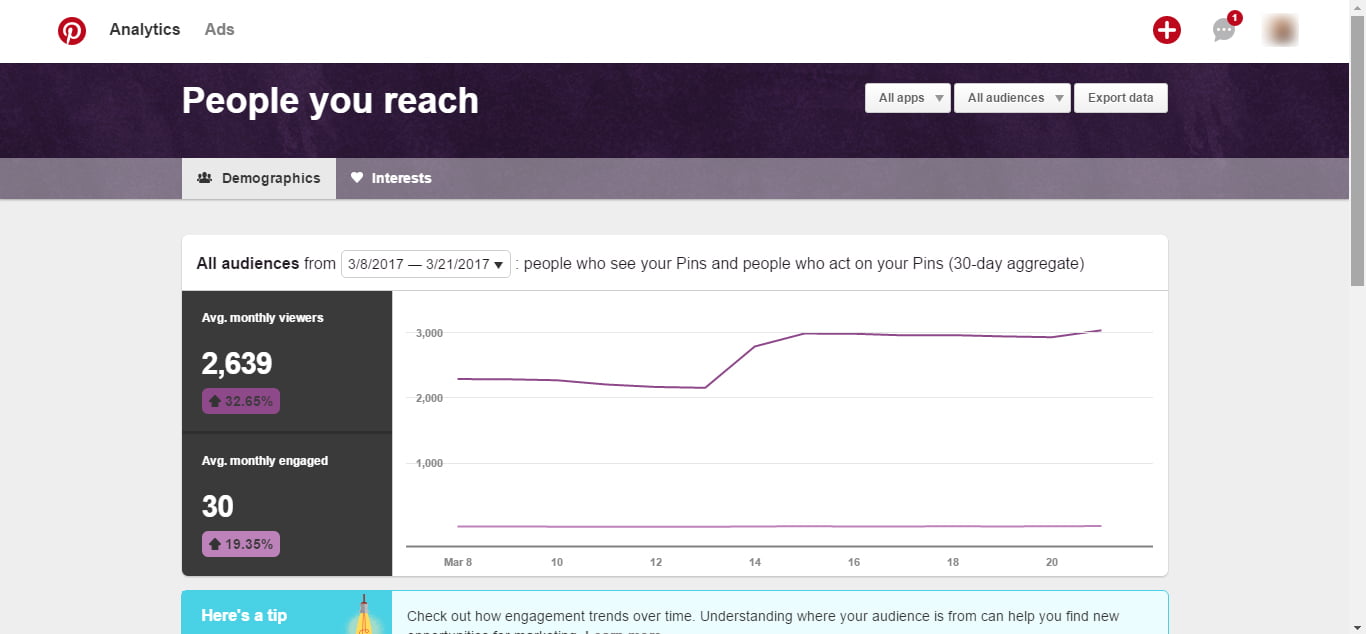
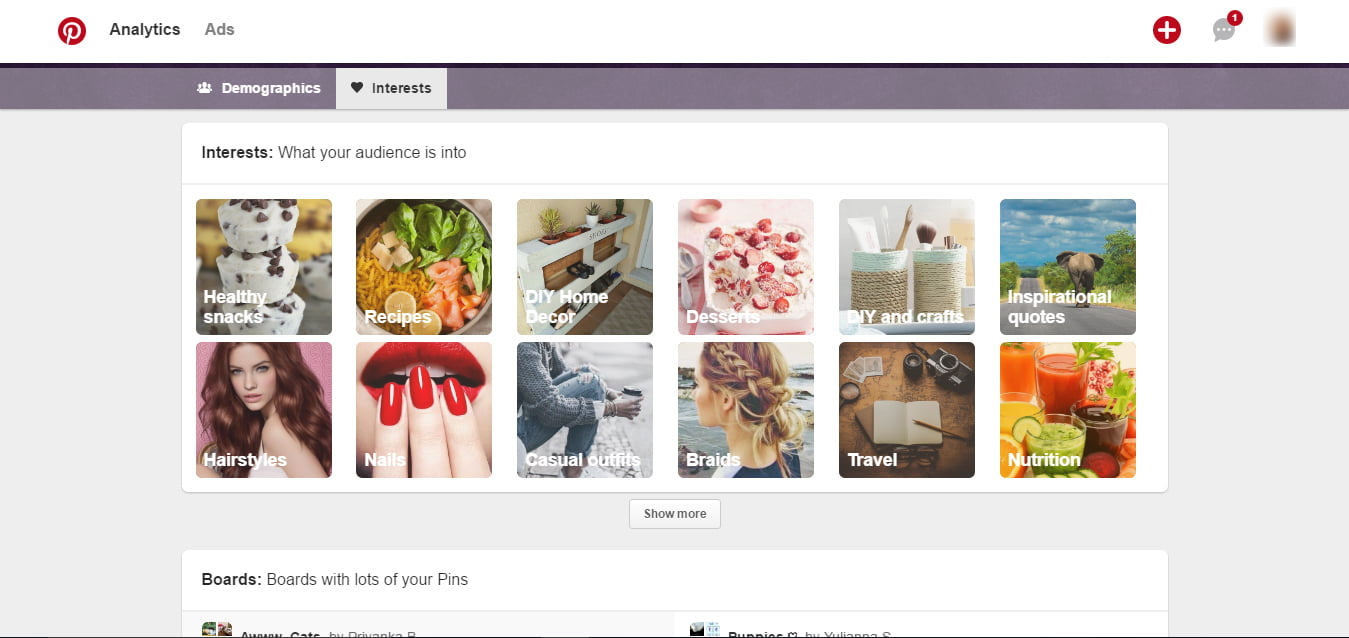
The “People You Reach” tab shows you demographic and interests data about the people that you have “reached,” which Pinterest is defining as “people who see your Pins and people who act on your Pins.” Demographics is pretty self-explanatory, but the Interests tab, when you filter it to “your followers” on the drop-down, shows you a deeper view into your followers by giving you a look at the boards that have a lot of your pins on them, categories that your audience is following, as well as other brands they interact with. This can be valuable when you’re looking for content that interests them, so you can pin more of it or create some yourself.
Website
This area gives information about how the pins from your website are performing. It will show you data for impressions, saves, clicks, original pins, all-time, and the save button. Just like on the Profile section, the impressions, clicks, and saves give you information about the top performing pins and boards based on those filters. “Original Pins” are “unique Pins created directly from your website,” and some aggregate information about the “newest pins created from your website.” All-time is the same as in the profile section, only pertaining to the pins that go back to your website, and the “Save Button” tab shares data about activity coming directly from the save buttons on your website.
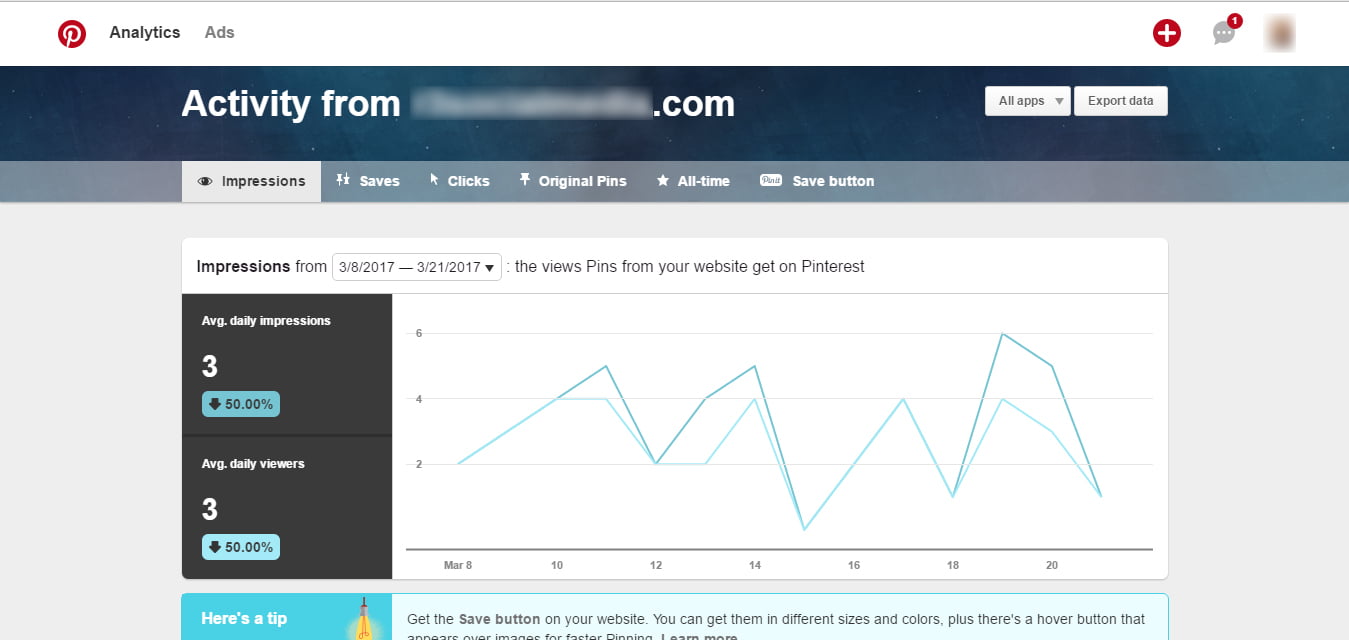
All of this data is super helpful, especially the information about pins from your website and the people you reach sections, because it can help us determine what material is working for us and what material might not be, plus more information about your audience and what they like, to give us more ammo about what they like to see.
Google Analytics
When using our Pinterest Analytics, we also want to check with Google Analytics (GA) to be sure that what we’re seeing syncs up. Now, Pinterest doesn’t tell you about your traffic necessarily, but it will tell you if people are pinning your content. From there, we’ll need GA to tell us that the pins are converting to real traffic and how that traffic is acting once they get to our site.
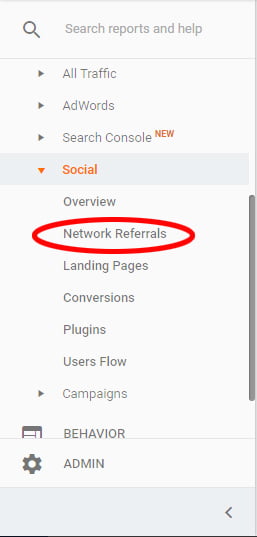
You’ll want to check the “Network Referrals” report, under “Acquisition” and “Social” to see how Pinterest traffic is acting.
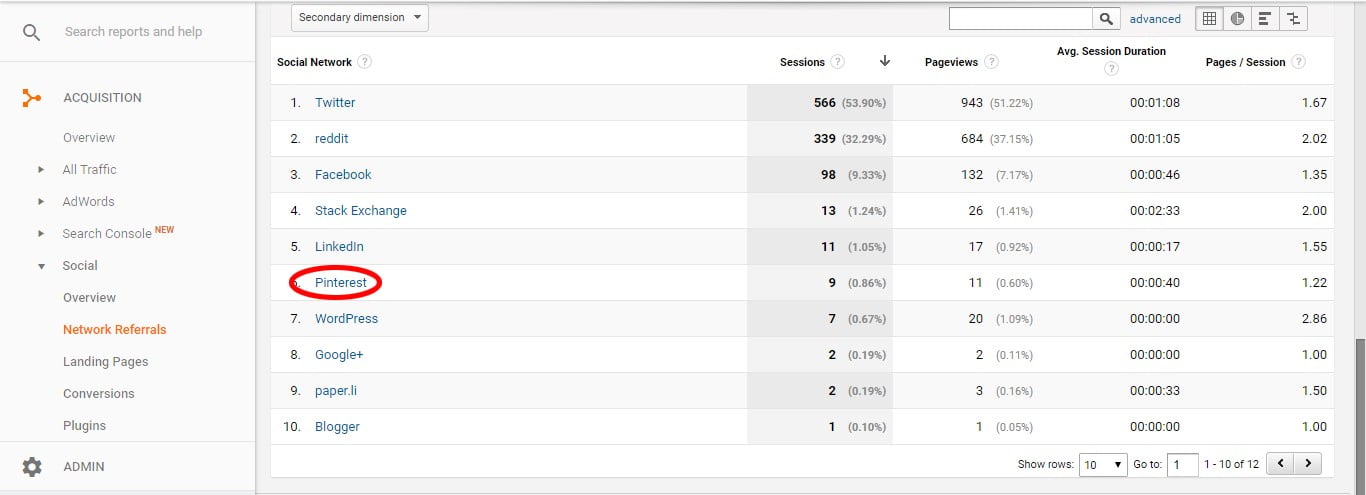
If you don’t see Pinterest here, you can also look at “Referral Traffic” report under “Acquisition” and “All Traffic” to find Pinterest. Once you locate it, click on the Pinterest URL to determine what URLs from your site are performing in what way, and how that traffic is performing against your overall traffic.
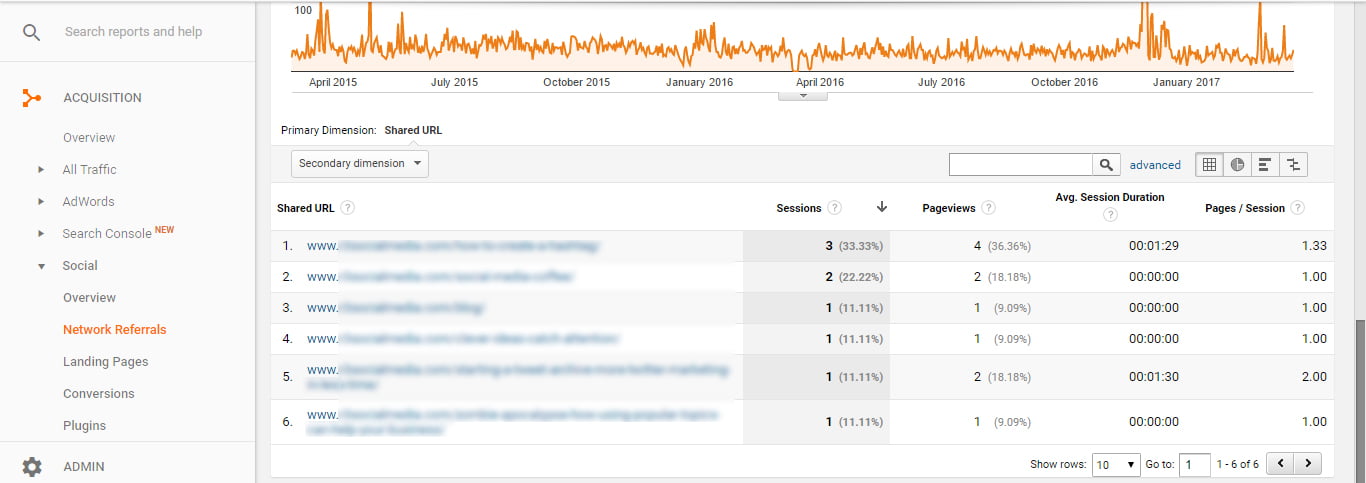
All of this data will tell us if the traffic is doing well, or doing poorly. If we’re getting low session duration and pages per session numbers, odds are, people like what they see on the pin, but the content is not matching expectations. If your numbers are overall poor for this platform, you may need to consider 1) a different strategy, and 2) a different persona or target audience for this platform.

These URLs/Pins are sending a few clicks, but the avg. session duration and pages/session numbers show me people are probably bouncing right off the page after getting there.
Start Your Pinterest Marketing with a Goal in Mind
So overall, armed with all of this information, you should be ready to go test out a new Pinterest strategy for your blog or products/services! Try pinning for 10–15 minutes every day, while also commenting on pins as you go. Sometimes people forget that Pinterest is a social network but it is, and commenting can help you stand out amongst the competition. After about a month, check out your numbers and see what they’re telling you. If they are growing, great – you’re doing a good job! If the numbers are flat or non-existent, you really need to reconsider your strategy. If it goes on like that for too long (2–3 months), you may either be way off base with your content and strategies, or you need to reconsider what kind of audience you have on the platform and if it matches your customer base.
Most of all, don’t be afraid to change it up! If something isn’t working, try something else! And always start with a goal in mind.
Are you ready to get started with marketing yourself or your products on Pinterest?
Roxanne Roark
Roxanne R. Roark is a seasoned social media marketer from Tulsa, Ok, with a passion for learning and conquering the digital space for her clients through strategic social media marketing!


